Summer is here and that means it’s time to get that pretty sun hat out into our lives – right?
My Instagram and Pinterest have been buzzing with these super glam slogan sun hats that I could not help drooling over. I had been feeling really “crafty” (wink-wink ;-)) lately, so to satisfy that itch I decided to make my own Slogan Hat without spending the $$! So last weekend, I made a quick trip to Daiso (the Japanese version of the dollar store) and got myself a few things for this honestly easy DIY.
Prepping ♥

A floppy hat (nothing to do with the 5-1/4″ of 3-1/2″ varieties!) with a large brim or anything your heart desires (I had one already)
Coloured Sequin trimming
Hot Glue (Gun and stick) or Fabric glue
Scissors
Chalk, Sharpie – anything needed to write the slogan
Lastly, lot of patience !!!
How I made it ♥
First step was to decide on the slogan – this is where we can get as creative as we want. Some ideas are: Do not Disturb, Out of Office, Go Away. I had already decided that I wanted “Vitamin Sea“ to be written on the hat, so I wrote it out on the hat with a marker. I should have used a chalk since its more forgiving than a black marker.

One point I learnt was that it’s better to keep the letters well spaced out (slightly more than in the picture above) – it makes sticking the sequins in the next step easier.
Now, taking very small sections and gently dabbing the glue on the hat over the letters, I began placing the sequin ribbon over them.
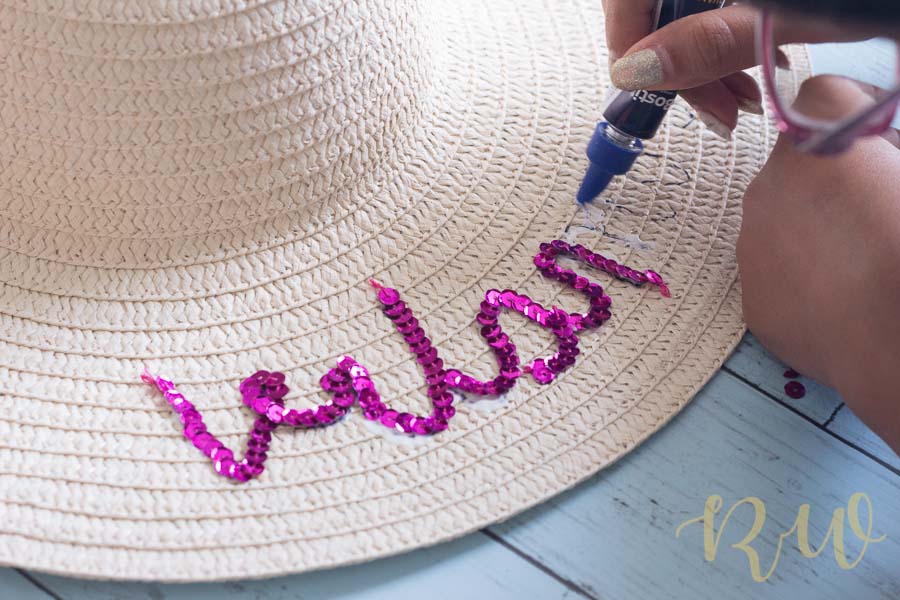
Even before i knew it, I had customised my hat and it looked totally cute! I finished by gluing a thin plain ribbon around the hat to give it a complete look. There it is – My very own Sequin Slogan hat!

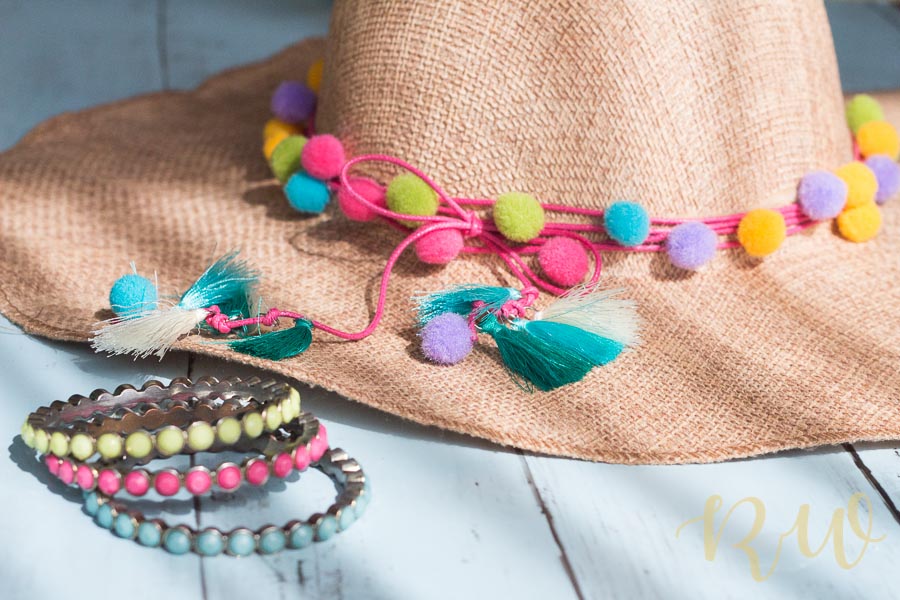
With the second hat I wanted to decorate it with pom poms and tassels since they are also very much on trend these days and look adorable with anything actually.
Prepping ♥
A sun hat
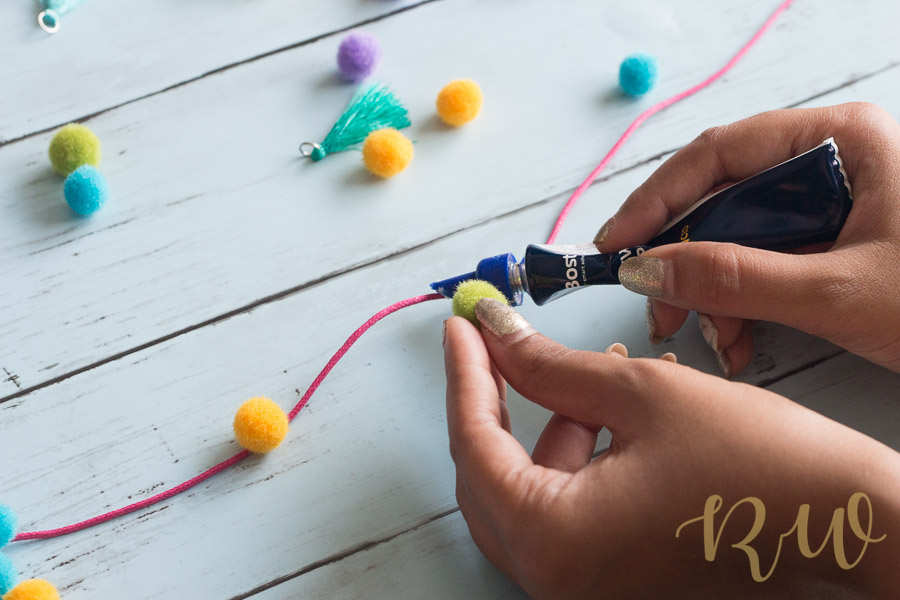
Pompoms, tassels, coloured string
Glue
Scissors
How I made it ♥
I measured the length of string I wanted by wrapping it around the base of the hat few times. Once satisfied I cut it and carefully glued the pom pom balls onto the string at intervals.
Then I wrapped the string around the hat and tied a bow when done.
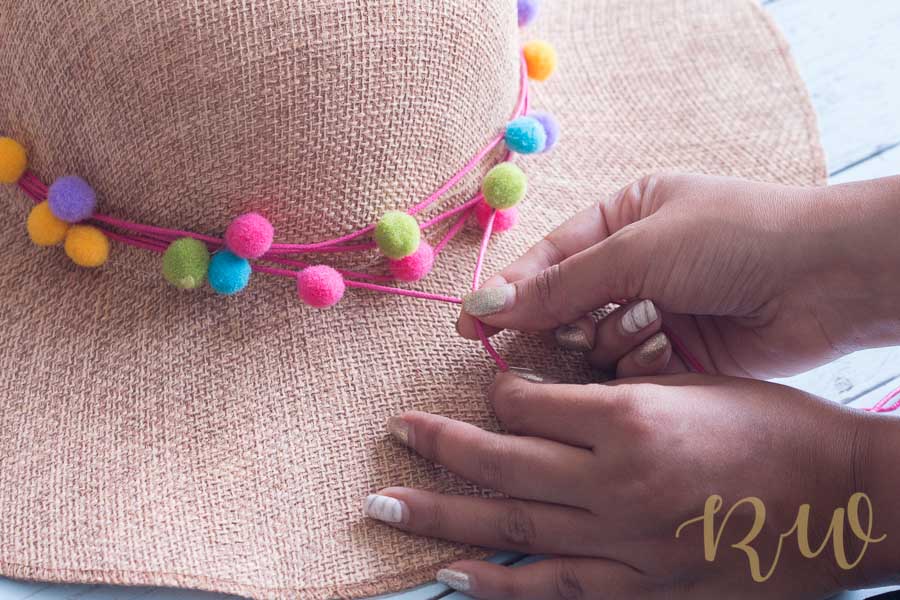
I attached a few tassels to the ends to give it a shabby chic look.

This DIY is so customisable that you can let your imagination go wild when its comes to decorating your hat, be it with decorative items (flowers, embroidered patches, sharpies, ribbons) or with bright colours and clever sayings!
I had spent S$6 on the Slogan Hat and when I looked up online I was shocked to see the prices they were selling for!! Looks like I saved me-self some monehhhh!! Time to go shopping?
Till then,
Happy Crafting – Do tag me if you DIY your Summer Hat
xx
Wow! These are some very doable yet amazing ideas to deck up a summer hat. Going to try atleast one of these ideas.
Author
Thanks Anupriya !